Wednesday, December 9, 2015

Furiosa

This is my attempt at sculpting Furiosa from Mad Max: Fury Road.
I'll say it up front that I don't like the eyes, but after spending about 
3 hours on them, I kinda gave up for now.

EDIT: the compression on these pictures makes some of the colors look a little wonky.


This is a base model I started from. I grabbed it from the project files on a tutorial from digitaltutors. The tutorial detailed how to model a realistic human head/face.


This is blocking out shapes. The tutorial started out sculpting a male, then transforming it into a female face.


More positioning and shaping at a higher resolution here.


This one is considerably further along than the last one. The face looks more feminine, but is quite gaunt and sullen looking.


This is the point where I had the face model where I really liked it. I added some substance to the cheeks and I have the fibermesh on which adds to it. It was a little tricky since Furiosa doesn't have a traditional female hairstyle to help accentuate, so I had to make the face look as good as I could. I personally think the eyes are slightly too big here and the brow isn't quite right, but from this point on, I did a lot of work on the eyes and was never as satisfied as I was with this one. I guess I just really liked the shape, position, and proportions of everything here. Except the eyes, they're a little big.


Here I began coloring the skin. In between this and the previous picture, I added TONS of fine details to the skin; pores, crows feet, wrinkle lines, and such. It really brought it to the next level (for the level I'm working at, at least. That's not saying much).


So the skin work was done as follows.
Pores: I used the standard brush with a spray stroke and a spray-like alpha. I held alt to make it sculpt in to the model (not pull out). I had the brush size very small, because the size of the pores would be bigger if the brush was bigger. Then I just did it all over. The pores near the jawline and chin are bigger, since pores in the face are bigger there as well.

Wrinkles: I can't recall the name of the brush, but the hotkey was S then 3 in the brush tab. I used that brush at a low intensity and down to a brush size of 1. drew in lots of very faint lines, in many directions. This is because the small lines on the face are not just defined creases, but are in face lots of little lines that all follow a general path. This was done around the eyes; the corners and below, as well as by the nose and corners of the lips. I also used this on the lips to give the more vertical line look. I do not care for how the lips came out.

Skin Color: So for the skin color I started with a base skin color. I covered the whole model in a flat coat of it. With the pores and wrinkles, this already didn't look bad. But skin has lots of colors to it. I then used the same settings as for the pores, but with paint, and a bigger brush size. The pores were done with around a 5-10 brush size. For the skin I used a 20-30, on a 50 intensity. I picked a mid-tone red color and painted the whole face until the red tint was visible. I then did the same with a mid-tone blue. Finally I followed all that up with a second pass of a base skin color. I think it really made the skin look a lot more realistic. Then in areas such as below the eyes, the cheeks, and lips, I went over again with a little more red because the skin is thinner there, so the blood vessels show through a tiny bit more.


This is just an up-close look at the skin details of the nose, lips, eyes, and cheeks. I like how it came out.


Now the eyeballs are done and they're okay I guess, not too great though. I wanted to change the subtool's material for the eyes to "toy plastic" but every time I did, it changed the material of the entire face and it looked bad. Since I couldn't figure out how to separate them out, I settled on a blinn material for everything. It gives the eyes the shine they need, and the skin could use a little too. Also at this point I've already added Furiosa's trademark "oil-and-grime" look that pretty much covers her entire face. I just painted with black, then went over it with the skin tones again to make it pop out a little less. One detail I'll kinda brag that I added is on her forehead. I used the base skin shade with the straight lines alpha brush (don't remember it's name) and went horizontally on the forehead over the oil. I think it really looked good because those creases in the forehead for whatever reason stay a little cleaner when people have things on their face. I suppose it's because the skin rubs against itself and takes things off.


Final picture with ZBrush's BPR button.

Overall, I LOVE Zbrush compared to Mudbox, and after spending a lot of time with it, it became much less difficult to use. I definitely learned a lot with Zbrush, and I found I like sculpting more than I expected I would!

I hate those eyes though.

EDIT


Here's a slightly edited picture that makes the eyes a bit better.


Here is a very quick version with skin painted on and the eyes more narrow. I like this one the most.


Sunday, November 22, 2015

Zbrush Imp

This was our first project in Zbrush. We were making an imp, similar to the first project we had in Mudbox.


This is using Zspheres to block out a shape. I thing zspheres are pretty cool, because they take a lot of the hassle out of blocking out a character shape. To do something like this in Mudbox, I think the only way is to block it out in Maya or 3dsMax first, which involves moving lots of vertices and such.
Maybe there's other ways I don't know about, but I like this because it's simple place and move.


Here is the full character shape with just zspheres.


After making zspheres, you then press A on the keyboard and it changes your zspheres into a basic 3D model. It's really useful.


Then I went through following the tutorial, adding details on a low subdivision. Later, you bump the subdivisions up to add finer details, just like in Mudbox.


This is a high sub-level with lots of details, and different color base/material. I am beginning to add the eyes here.


This is from the section with the watch parts. I got the project files for this base that the imp would stand on and I planned on painting it myself, but then I learned we only needed to do the imps.


This is a final picture of my Imp with crazy hair. I thought adding hair was pretty cool since you basically draw a mask and click a button. It made it really simple, because then you can just use specific brushes to add details in the hair.

Overall, I like ZBrush wayyyyy more than mudbox. It is quite a bit more difficult to grasp and understand how to use, but I can pretty clearly see how powerful it is. I like it a lot.

Monday, November 2, 2015

Mecoptera


This is a Mecoptera, also known as a scorpionfly. I decided to model it because it's kind of frightening, and pretty nasty looking. The "stinger" is actually its genitals though, so jokes on them.


I started by using a black and white drawing (?) as a reference image. I modeled it in maya by making the geometry transparent and then moving the vertices where I wanted them.


 It was pretty much finished after adding the wings and the antennae.


 I selected it all and them imported it all. This did not work well. Mudbox didn't like anything too complex at all and in fact just decided it hated me for even attempting this, and for the rest of my experience it plagued me with random crashes, becoming unresponsive every time I saved, and just generally ruining my day at every turn.


 So then I decided I would try and be friends with this all-seeing entity that apparently was really angry that I would dare to try using Maya for anything. I restarted completely in Mudbox. This simple geometry I made in Mudbox stopped working regularly. I made it from scaling a cube up and out, but it wasn't having it.


 This would be restart number 3. I used a cube in mudbox, rotated it, and extended it, then retopologized it. There should be no problems now, right?


 And for a brief while, I believed peace and cooperation had been achieved with Mudbox. I managed to sculpt a very basic head shape. Progress, considering the last 4 days of work didn't yield any results.


 I pushed my luck, and managed to clean up the previous maya version and import it. I aligned, scaled, and rotated my way to a somewhat successful rendition of this bug.


 Considering that I had stopped counting the amount of crashes I'd run into, I felt pretty good with this Frankenstein's monster of a design, put together with the bodies of different crashed files.

This joyful reprise was short lived.


 My file was corrupt again, and I was at my wits end with this one. All I had left was starting over, doing it differently, as if I alone had control over time itself and were doomed to replay my own life, time and time again until one day, impossibly, I would at last be free.


 I had no words. Every save was a coin flip. I would click the button, watch the little green wheel of my cursor spin around and around. I'd click on Mudbox, and mudbox would go grey. The text I'd become familiar with taunted me on the top of the window: "Not Responding"

Every time I saved, Mudbox was there to toy with my emotions and give it's final say if it would allow itself to save.


 But the story was not over. I had achieved progress. Somehow, starting over from just a sphere and grabbing and stretching and grabbing and stretching over and over and over led me to the piece seen here. Certain brushes didn't work. Smoothing was basically non existent. But I had progress. I made a functional, if badly proportioned head. But it was there.


 I was able to make legs too, and duplicate them and place them where they went. I felt as if I had emerged from dust into a world of possibilities, choices, and opportunities for the first time. I was now, finally, free.


 I wasted no time in adding wings. Who knew when this reality would reveal itself as just a facade, just a mere veneer of security, as it were, and I would be forced to once again restart.


By the day it was time to present to the class, I was happy. I had managed to keep the beast at bay. I had evidently satiated it's hunger for my time, for my effort and resources. It was a tamed beast, at my will to be used. Right?

No. Of course not. As I loaded my file, "meco_15" I was greeted with a small pop-up box.
"Mudbox has encountered an error and needs to close." The error told me. I responded with clicking "OK"

"Would you like to send this error to Autodesk?"
Sure.

And then nothing. No Mudbox running. So I open file "meco_14" sure that it was just a problem in transitioning the file. NOPE. 14 was corrupt as well. And 13. Can't forget about 13.

At this point, all I could do was open file 12, import some basic geometry from maya (praise be to whatever caused it to work this time) and set them in the general area. It was over, Mudbox had defeated me.


tl;dr
Mudbox broke me down into a shell of a man.

Sunday, September 20, 2015

Imp - 9/20/15


 Here I have the Imp I sculpted with the background in place. The background wasn't complicated at all, so making it took almost no time.


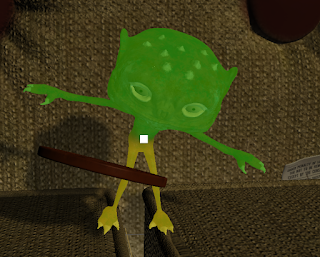
 Now I am beginning to paint the Imp.


 My Imp is more brown/green than the one in the tutorial. Painting is easy to grasp but seemingly very difficult to master.

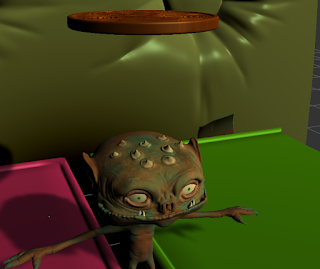
 Here I have the imp that has been painted, as well as the unpainted penny above him. The penny was also simple enough to do.


 This is the penny after it's been touched up. I think it looks a little more closer to the color of an old golden dollar coin, now that I look at this screenshot again.


 Between this picture and the last picture, I had a save corrupted. Yay. That set me back an hour or so, but It wasn't the time that hurt as much as losing the painting I did. I liked what I'd done in the lab using the nice tablet, but working with a mouse and keyboard on my computer, I just wasn't able to make it look how I had.


 I'm beginning to pose the Imp now. I placed the penny in the general area I wanted it, then started to move the character around it. Posing was very slow. For some reason, it seemed to be very taxing on my computer even though I have quite a high-end machine. I probably need to tweak settings. Or maybe Mudbox is just more demanding than I assume.


 Here is some more fine posing of the fingers. Notice the (Not responding) in the top corner. Every time I saved, Mudbox would lock up for 5-10 minutes. After every pose adjustment, it would take 1-3 minutes to process it.


 Here I have a final shot of the imp holding the penny in both hands, instead of cradling it in his arms.


Here is another angle on the finished Imp.

Overall, I'm pretty disappointed that I ran into so many issues with Mudbox. I like doing the sculpting, but so far the crashes and save corruptions have left a sour taste in my mouth. It is a bummer when something you should enjoy becomes tedious because of how you have to do it. Hopefully I won't run into so many issues in Mudbox in the future!

Wednesday, September 16, 2015

Imp - 9/16/15

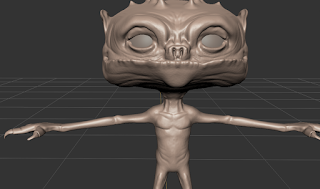
This is my first foray into digital sculpting in general, and I'm using Mudbox. I'm following a digitaltutors tutorial, so this is the progress.


 I had forgotten to take pictures at the beginning, so I'm starting here. I'm working on the ears in this picture.
 Here's an overview of the face, before adding much detail.
 In this picture, I had the body frozen except for the claws, so I could work on them without messing up the hands.
 Here's a progress picture where I've added much more detail.
This is my near final version of the Imp, before adding the background. I will likely add more details once the background is set, but for now I will work with this.